Cardiopulmonary Resuscitation (CPR) is a life-saving technique used in emergencies when someone’s heart has stopped beating or they are not breathing. CPR helps maintain blood flow and oxygen delivery to vital organs, increasing the chances of survival until professional medical assistance arrives. Whether responding to a sudden cardiac arrest, drowning, or choking incident, knowing the proper CPR steps can make all the difference.
Understanding the seven essential steps of CPR ensures that responders act quickly and effectively in high-pressure situations. Proper training, such as CPR Jacksonville FL courses, provides individuals with the confidence and hands-on experience needed to perform CPR correctly. Below, we break down the seven crucial steps of CPR, emphasizing the importance of each stage in saving a life.

Step 1: Assess the Situation and Check for Safety
Before assisting, ensure the scene is safe for both you and the victim. Look for potential hazards, such as traffic, fire, water, or electrical dangers, that could put you at risk. If the area is unsafe, do not proceed until it becomes secure. Assessing the situation helps prevent further harm and ensures that you can provide aid without jeopardizing your safety.
Once you determine it is safe to approach, quickly observe the person’s condition. If they appear unresponsive or in distress, proceed to the next step without delay.
Step 2: Check for Responsiveness
Gently tap the person on the shoulder and loudly ask, “Are you okay?” If there is no response, the individual is likely unconscious and in need of immediate assistance. For infants, tap the bottom of their foot to check for responsiveness.
If the person remains unresponsive, it is critical to act fast. Every second counts in a medical emergency, and moving swiftly to the next step can improve the chances of survival.
Step 3: Call 911 and get an AED (if available)
If the person is unresponsive, call 911 immediately or instruct someone nearby to do so. Provide essential details, including the victim’s condition and location, so emergency responders can arrive as quickly as possible. If you are alone, use a speakerphone to call for help while continuing to assess the victim.
If an Automated External Defibrillator (AED) is available, retrieve it or ask a bystander to bring it to the scene. AEDs can deliver a controlled shock to restart the heart in cases of sudden cardiac arrest. Having an AED ready can significantly improve survival rates when used in combination with CPR.
Step 4: Open the Airway
To restore airflow, gently position the person on their back and use the head-tilt, chin-lift technique. Place one hand on the forehead while using the fingers of your other hand to lift the chin. This maneuver helps clear any obstructions in the airway, allowing for proper breathing assessment.
Be cautious when performing this step, especially if a spinal injury is suspected. In such cases, minimize head movement and use a jaw-thrust maneuver instead to prevent further injury.
Step 5: Check for Breathing
Once the airway is open, check for normal breathing by looking, listening, and feeling for air movement. Watch for chest rise and fall, listen for breath sounds, and feel for airflow against your cheek. This assessment should take no longer than 10 seconds.
If the person is not breathing or is only gasping, begin CPR immediately. Gasping, also known as agonal breathing, is not normal breathing and should be treated as a sign of cardiac arrest.
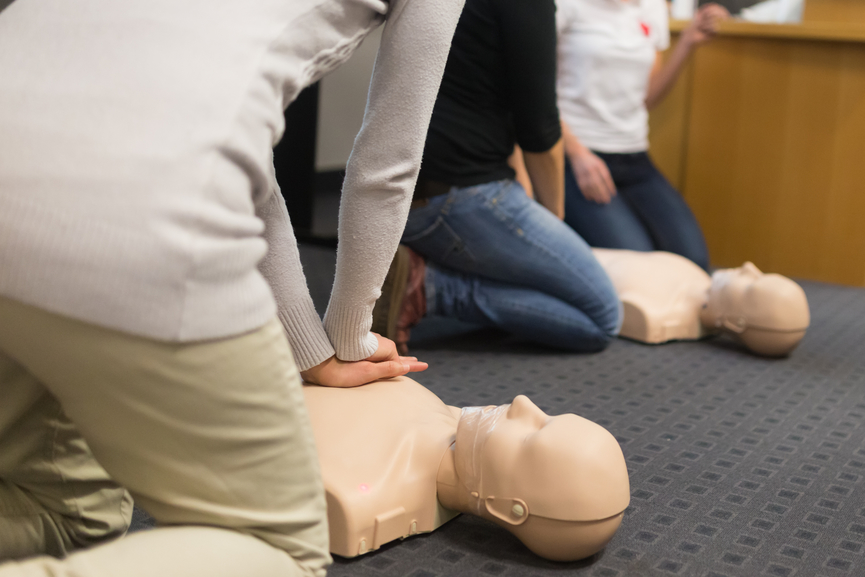
Step 6: Begin Chest Compressions and Rescue Breaths
Start high-quality chest compressions to maintain circulation. Position your hands in the center of the chest, just below the nipple line, and use the heel of one hand (for children) or both hands (for adults) to apply firm, downward compressions.
- Perform 30 chest compressions at a depth of at least 2 inches (5 cm) for adults and about 2 inches (one-third the chest depth) for children.
- Maintain a compression rate of 100-120 per minute to ensure adequate blood circulation.
- Allow for full chest recoil between compressions to let the heart refill with blood.
After 30 compressions, provide 2 rescue breaths:
- Ensure the airway is open using the head-tilt, chin-lift technique.
- Pinch the nose shut and cover the victim’s mouth with yours to create an airtight seal.
- Breathe in gently and steadily for about one second, ensuring the chest rises.
- If the chest does not rise, reposition the head and attempt another breath.
Repeat the 30:2 compression-to-breath ratio continuously until emergency responders arrive or the person starts showing signs of recovery.
Step 7: Use an AED if Available
If an AED is accessible, turn it on immediately and follow the voice prompts. AEDs provide step-by-step instructions to guide responders through the process.
- Attach the electrode pads to the person’s bare chest as indicated on the device.
- If a shock is advised, ensure no one is touching the victim before pressing the shock button.
- Resume CPR immediately after delivering the shock unless the AED advises otherwise.
- If no shock is required, continue CPR until professional help arrives.
AEDs are designed for ease of use and can be lifesaving in cardiac emergencies. Early defibrillation combined with high-quality CPR dramatically increases survival rates.
Knowing the seven steps of CPR equips individuals with the skills needed to respond effectively during a medical emergency. These critical actions—assessing the situation, checking responsiveness, calling for help, opening the airway, checking for breathing, performing compressions and rescue breaths, and using an AED—ensure that victims receive immediate life-saving care.
Becoming CPR-certified through professional training, such as courses offered by CPR Jacksonville FL, provides hands-on experience and enhances confidence in emergencies. Whether you are a parent, teacher, healthcare provider, or simply a concerned citizen, learning CPR can empower you to save lives.
Don’t wait for an emergency to realize the importance of CPR training. Sign up for a CPR certification course today and be prepared to make a difference.